Wednesday, August 29, 2012

Chocolate Povitica for BBD#53

When I chose the topic for this month's Bread Baking Day event, I wasn't sure what I was going to choose as my own submission. There are so many beautiful and delicious options that it was very hard to choose just one. But my mind kept returning to a beautiful and utterly swirl-filled bread that I'd made once before, and I just knew that I would take this opportunity to make it again.

I'm talking about the povitica.  I originally made the povitica as a Daring Bakers' Challenge, but have been looking for an opportunity to try it again, as everyone in the family truly enjoyed it.  And, being the swirliest bread that I have ever made, I knew that now was the time.

The original recipe provided for the challenge was written to make four loaves. When I made the bread for the challenge, I halved the recipe and made two loaves. Today I chose to make just one, so did a little bit of math and quartered the recipe.

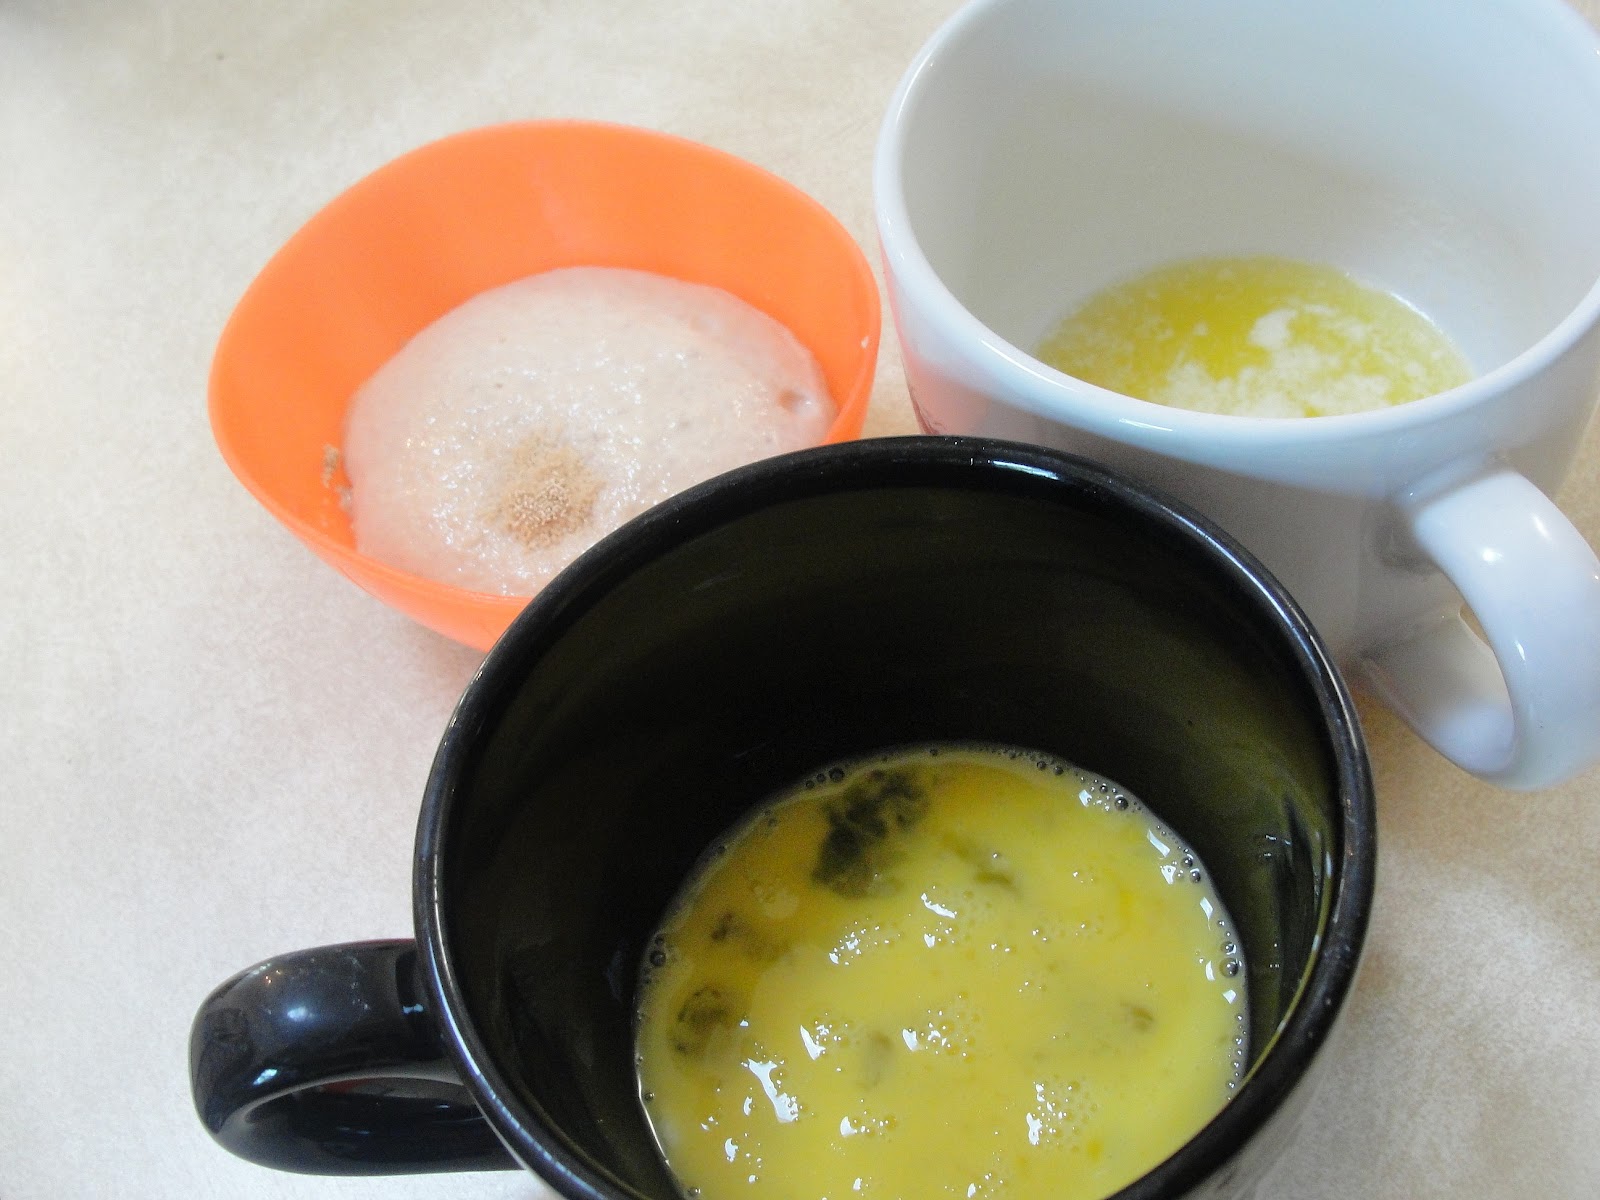
The dough comes together pretty easily, but has  a few components, including activated yeast, melted butter and beaten egg, so it generates quite a few dishes.


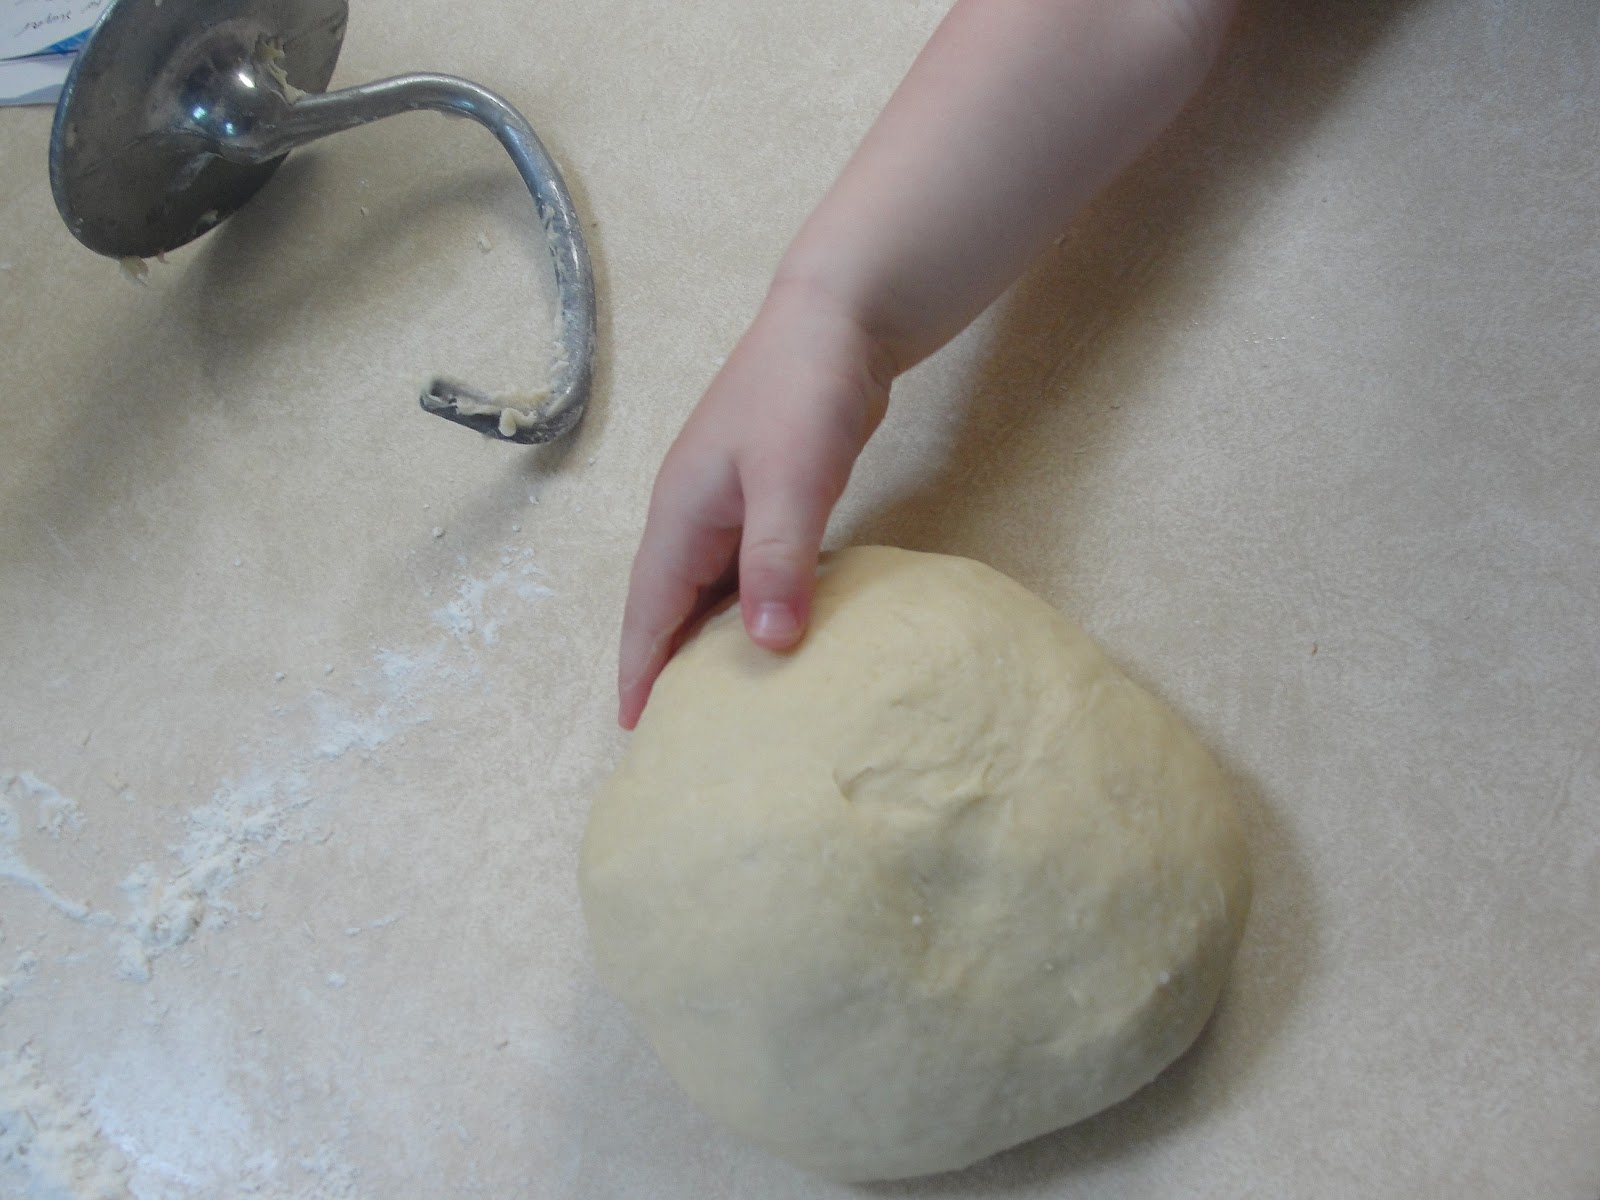
But after some heating, cooling, mixing and kneading, the result is a dough so soft and smooth that some little boy, who shall remain nameless, could not keep his hands off of it.


I set the dough aside to rise and we went about the rest of our morning.

Once little man went down for his nap, it was time to get down to the nitty gritty of this bread.

As a filling, I chose to go with chocolate. The traditional fillings for this type of bread include either nuts, which we avoid in our house due to allergies, or poppy seends, of which I am not a huge fan.  So I chose a sure crowd pleaser.

Chocolate.


To my cocoa powder, cinnamon, sugar and chocolate chips, I added boiled coconut milk and butter.


The hot milk melted the chips and the result was a smooth and pretty delicious looking and smelling chocolate spread that was all ready to go.

The dough had risen beautifully, so I carefully deflated it and turned it out onto a well cleaned and well floured counter. I used the two foot by three foot island in my kitchen.


And I rolled out that dough as thinly as I could.


Okay, I probably could have rolled it a little thinner, but I was starting to worry about time, so I stopped when I could see through it, and proceeded to spread on the delicious filling...


...until it basically looked like I'd covered the entire kitchen island with chocolate sauce.


And then we roll! It's a little tough to neatly roll dough that thin, but I made it work...


And then I coiled the rolled dough into a loaf pan.


Phew.

I then put the bread into the oven and (im)patiently waited. It came out just in time to pick little miss up from school, so I turned it out, on its side, on a cooling rack. Turned out so that it wouldn't gather condensation in the pan, creating a soggy bottom, on its side so that it wouldn't collapse on itself.

Which worked alright, but it did wind up slanting the side in a bit...

But that's okay, because it still swirled beautifully!!


It kind of reminds me of zebra stripes, with all of those random dark swirls...


But the most important thing is how tasty it is.


Seriously, I don't think this bread will last until the morning. We've eaten two thirds of it already. I probably should have made two. There is a decent chance that I will be making another one of these before the weekend...


Chocolate Povitica
(slightly adapted from The Gingered Whisk)

To Activate the Yeast:
1/8 cup warm water
1/2 teaspoon sugar
1/4 teaspoon flour
1/2 tablespoon active-dry yeast

For the Dough:
1/2 cup milk (the higher the fat the better) (I used coconut milk)
3 tablespoons sugar
1/2 teaspoon salt
1 egg
2 tablespoons unsalted butter, melted
2 cups flour (approximately)

For the Filling:
1/2 cup milk (the higher the fat the better) (I used coconut milk)
1/4 cup unsalted butter
1 teaspoon vanilla extract
1/4 cup sugar
1 teaspoon cocoa powder
1 teaspoon ground cinnamon
1/2 cup chocolate chips

To activate the yeast:
In a small bowl, stir sugar, flour, and the yeast into the warm water and cover with plastic wrap. Allow to stand for about 5 minutes.

To make the dough:

In a small saucepan, heat the milk up to just below boiling (about 180 F or 82 C), stirring constantly so that a film does not form on the top of the milk. You want it hot enough to scald you, but not boiling. Allow to cool slightly, until it is about 110 degrees.
In a the bowl of your stand mixer, mix the scalded milk, sugar, and salt until combined.
Add the beaten egg, yeast mixture, melted butter, and 1/2 cup of flour.
Blend thoroughly and slowly, add remaining flour, mixing well until the dough just starts to clean the bowl. Don't add too much flour at this point, you still want it to be fairly wet and sticky.
Turn dough out onto floured surface and knead, gradually adding flour a little at a time, until the dough is smooth and does not stick.

Place the dough into a lightly oiled bowl, cover loosely with a layer of plastic wrap and then a kitchen towel and let rise an hour and a half in a warm place, until doubled in size.

While the dough rests, prepare your filling:
In a medium bowl, mix together the sugar, cocoa, cinnamon, flour and chocolate chips.
Heat the milk, butter and vanilla extract to boiling.
Pour the liquid over the chocolate/sugar mixture and stir carefully until all of the chips have melted and the mixture is smooth.
Add the egg and continue to mix thoroughly.
Allow the mixture to stand at room temperature until ready to be spread on the dough.
(If the mixture thickens, add a small amount of warm milk.)

Once the dough and your filling mixture is done and cooled, it is time to assemble the bread.
Generously flour a large surface - a table, a kitchen island - or, if all else fails, clean and flour a sheet and spread it on the floor! You need space for this.
Roll the dough as big and thin as you can. You can use your hands to gently pull and stretch the dough, as well. As you work, try to lift the dough from the surface periodically to both help stretch the dough and to make sure that it is not sticking to your work surface. When you think you have rolled the dough about as thin as you can, try just a little more - this dough as very stretchy and you can probably get it just a bit thinner!
Carefully spread the filling over the stretched dough until it is covered.
Carefully (again!) roll up the dough, starting at a long end, jelly roll style until it is a long, rolled snake.
Once the dough is rolled up into a rope, gently lift it up and place it into a greased loaf pan in the shape of a “U”, with the ends meeting in the middle. You want to coil the dough around itself, as this will give the dough its characteristic look when sliced.
Once the dough is in the pan, cover it loosely with plastic wrap and preheat your oven to 350 degrees. The bread needs to rest for about 15 minutes, which gives your oven just about the perfect amount of time to preheat.
Once the bread has rested and the oven is preheated, put the pan in the oven and bake for 15 minutes at 350 degrees.
After 15 minutes at 350 degrees, lower the oven to 300 degrees and continue to bake for another 45 minutes. Check the bread after about half an hour to make sure it is not getting too brown. If needed, you can tent the bread with foil to keep the top from getting too dark.
When done, allow the bread to cool on a wire rack for at least half an hour.

Enjoy!


Monday, August 27, 2012

August Daring Bakers' Challenge - Pate A Choux Swans

Kat of The Bobwhites was our August 2012 Daring Baker hostess who inspired us to have fun in creating pate a choux shapes, filled with crème patisserie or Chantilly cream. We were encouraged to create swans or any shape we wanted and to go crazy with filling flavors allowing our creativity to go wild!

Did you read that?  Swans?

That's right. This month's challenge was not so much about the recipe (we'd made pate a choux before in the croquembouche challenge), and more about creativity.  Which is awesome. In theory.

In practice, I am fully aware that the artistry of baking, the decorating and the steady-hand work... well... they're not my strong suit.

But little miss took one look at the pictures posted in this challenge and I knew I'd have to try it right away.

I started by making a half batch of the choux pastry, which actually comes together pretty easily. Water, salt and butter melted together in a pot, flour is mixed in and the mixture is cooked together.  Then, removing the pot from the heat, eggs are beaten in.


Little miss loves playing the role of "electric mixer."


(ie: mixing really, really fast)

The resulting batter is thick and sticky.

And this is where the "easy" (for me) part ends. See, the next step is piping out shapes.  The swan bodies are easy - pipe a roughly oval-ish shape.


Then comes the tricky part.  The head and neck.

Kat told us to make a shape somewhere between a "2" and a question mark. Makes sense, right? Also requires a super steady hand. I watched a couple of youtube videos to increas my confidence, and then gave it a shot.


Not too shabby...

Using the half-batch, I was able to make seven sets of bodies/necks.  Things got busy in the house, so I didn't pull the neck pieces out quite quickly enough (they cook much faster than the bodies), but when everything came out of the oven, I was decently encouraged.


Instead of making the classic pastry-cream style filling for my swans, I chose to make a dairy-free chocolate pudding, as we were bringing these creations to a play date with some friends, and we had some food allergies to work around.  Little miss took over photography duties as I worked on the swan-construction.


(not too bad, huh??)

And then it was time to sit back and smile.


Oh my gosh - they actually looked like swans! How cool is that??


I had full well intended to try these again, even trying other shapes, but the month completely got away from me with *gasp* back-to-school preparation. Because today is little miss's first day of *gasp* first grade. How does this happen???

But these beautiful swans made her happy, were very fun to share with our friends, and proved to me that, while I am still no true artist, I can still make some cool looking treats. :)

Kat, thank you so much for this awesome, fun and creative challenge. I can honestly say that I never would have had the courage to try these without your inspiration!

To check out the other beautiful, fun and creative creatures baked up in the kitchen this month, check them out here.


Pate A Choux Pastry
(given recipe from the challenge)
(I halved the recipe)

½ cup (120 ml) (115 gm) (4 oz) butter
1 cup (240 ml) water
¼ teaspoon (1½ gm) salt
1 cup (240 ml) (140 gm) (5 oz) all-purpose flour
4 large eggs

Line at least two baking sheets with silicone mats or parchment paper, or grease pans well.
Preheat oven to 375°F.
In a small saucepot, combine butter, water, and salt. Heat until butter melts, then remove from stove.
Add flour all at once and beat, beat, beat the mixture until the dough pulls away from the sides of the pot.
Add one egg, and beat until well combined. Add remaining eggs individually, beating vigorously after each addition. Resulting mixture should be somewhat glossy, very smooth, and somewhat thick.
Using a ¼” (6 mm) tip on a pastry bag, pipe out about swan heads. You’re aiming for something between a numeral 2 and a question mark, with a little beak if you’re skilled and/or lucky.
Remove the tip from the bag and pipe out swan bodies. These will be about 1.5” (40 mm) long, and about 1” (25 mm) wide. One end should be a bit narrower than the other.
(note - the given recipe and instructions indicate that you should get 36 bodies/heads. My half batch yielded seven, a far cry from the 18 I'd expcted. Just make what works for you, trying to make sure you have heads for each body and bodies for each head!)
Bake the heads and bodies until golden and puffy. The heads will be done a few minutes before the bodies, so keep a close eye on the baking process.
Remove the pastries to a cooling rack, and let cool completely before filling.


To Assemble:

Take a swan body and use a very sharp knife to cut off the top portion (between a third and a half).
Cut the removed top down the center to make two wings.
Dollop a bit of filling (prepared and cooled in advance) into the body, insert head, and then add wings.
Your first attempt will probably not look like much, but the more you make, the more your bevy of swans will become a beautiful work of swan art.

Enjoy!

Friday, August 24, 2012

Mango-Cranberry Sourdough Bread

I am having so much fun with Sourdough Surprises, but it made me realize something that might seem a bit strange.

Of all of the things that I make with my sourdough starter, there is one thing that I don't make all that often.

Sourdough bread.

But when I saw the delicious, fruity, nutty, cheesy bread baked up by my friend Jenni, inspiration struck.

While her bread incorporated delicious strawberries, I am still on my mango kick. 

The bread starts with a levain, made by combining sourdough starter, water and bread. This sits overnight, and the bread is prepared the next morning.  So as my levain, well, rested, I pureed some mangoes.


And then all of the ingredients are placed into a large bowl...


...and gently mixed until combined.


I loved the color that the mango added, and wanted to try for some kind of mango swirl through the bread, to bring that color out even more in the finished bread. And then I thought that, rather than adding nuts and cheese, I wanted to keep it simple, while complementing the beautiful, orange mango.

So I chose to go with dried cranberries as my mix-in.


The tricky part was rolling that whole thing up to keep all that delicious filling in.


But I made it work, and got all of that swirly, fruity goodness incorporated in the dough with a series of rests and re-rolls.

And by the end of the afternoon, we were ready to bake.


The dough for this bread is pretty... loose. It has a high hydration (helped by the mango puree worked through it, too), so I knew that my loaf would be a bit rustic looking. But with the high heat of the oven, I was glad to see that it didn't expand much once it went into the oven.


Then came the hard part.

The waiting.

You really have to be patient with bread. If you cut it before it has a chance to cool, it will squish and lose its shape. Even if that shape is rustic.

So, believe it or not, we waited until morning to cut into the beauty.


But it was definitely worth the wait.


Both kids wanted more. And more. And more. I was really pleased with the crust (not crazy hard, but with a definite bite), the crumb (airy but not too light) and the taste (I mean, it's mango and cranberry!) of this bread.


I can't wait to try this with other fruits now!

This bread has been submitted to Yeastspotting at the Wild Yeast Blog.

Mango-Cranberry Sourdough Bread
(adapted from The Gingered Whisk)


For the Levain:
3 ounces starter
5.25 ounces water
8 ounces flour

Combine all ingredients and leave overnight, covered.

For the Bread:
all of the levain
9.25 ounces flour
0.125 ounces salt
3.25 ounces water
4.75 ounces + 1/4 cup mango puree (separated)
1/4 cup (approximately - to taste) craisins

Combine the levain, flour, water, salt and 4.75 ounces of mango puree, and allow to rest for 20 minutes.
On a lightly floured counter, stretch out the dough into a long rectangular shape.
Drizzle the 1/4 cup mango puree and sprinkle the craisins as evenly as possible across the dough, theb fold/roll the dough over top (which ever method you want to do this is fine, you just need to get it in there).
Place the dough in a large oiled bowl, cover, and allow to rest for 1 hour.
Stretch and fold the dough, place back in the bowl and allow to rest for 1 hour.
Make another stretch and fold, place back in the bowl, cover, and let sit for at least four hours.
(If you would like, you can place the dough in the refrigerator at this point to rest overnight)
When you are ready to bake, preheat the oven to 500 degrees and cover a baking sheet with parchment. Flour the parchment and turn the dough out onto it. Score the top of the loaf.
(If you have refrigerated the dough, pull the dough out of the fridge and place in a well floured couche,
allowing the dough to proof and come to room temperature before turning it out onto the parchment and scoring it.)
Place the bread in the oven and turn the oven down to 450.
Bake the loaf for 25-35 minutes, until nicely golden brown.
Cool for at least 1-2 hour before slicing.

Enjoy!

Monday, August 20, 2012

Sourdough Surprises #5 - Pies

Pie.

This month's Sourdough Surprises challenge was to make pie.

Other than requiring us to make a pie crust dough incorporating sourdough, this really didn't limit us. At all. Pie is so... varied! There are so many different kinds of pies - sweet, savory, single crust, double crust, fruit fillings, meat fillings, breakfasty fillings... seriously, you could probably eat pie for three meals a day without repeating varieties.

So the difficulty was deciding what kind of pie to make. Obviously, my first thought was dessert. Because, well, it's dessert. And I love dessert.

But then I had a hankering for chicken pot pie.  So decided to go with that. As this was a savory pie, I omitted the sugar from the recipe.

Otherwise, the dough comes together exactly like, well, regular pie dough. The try ingredients are combined, then butter is incorporated into it...


...and then liquid is mixed in to bind the whole thing. The difference here is that the liquid of choice is sourdough starter, rather than the "traditional" cold water.


And then just bring the dough together as usual. I left some of my butter pieces bigger, because I was trying very hard not to overwork my dough. Which resulted in some very visible butter spots when I went to wrap my dough and put it in the fridge.


While the dough chilled, I prepared the filling for my chicken pot pie. I try not to use "cream of" soups, and wanted to keep this version completely dairy free (to challenge myself. Yes, I know there was butter in the crust dough, so I can't claim that the whole thing was dairy free... but it was closer than usual...). I made the filling with oil and flour and chicken stock, creating a thick sauce, then mixed in diced leftover chicken from the precious night and a bag of mixed, frozen vegetables, as well as some diced mushrooms, just because we had them.

Once the filling was done, I poured it into a 9" x 13" baking dish, then rolled out my crust dough to fit over it.


A few vent holes, then into a nice hot oven for about half an hour.


The result was delicious, and the crust was flavorful and flaky. We could definitely taste the sourdough in this crust, but I felt that it went very well with the meal, so I was pleased.


But I still wanted to make a sweet pie.

Then my sister gave me two amazing gifts. The first was free-reign over her back-yard peach tree. I mean, how cool is that?  I peeled and diced the peaches and cooked them down with some sugar and cinnamon...


...until they turned into a sweet, delicious sauce.

The second gift was this adorable hand-pie press.


The bottom of the press serves as a cookie cutter, cutting out the correct sized rectangles to them place inside the press, add some filling, top with a second rectangle and, well, press!

I made these at night after the kids were in bed, so I don't have many pictures of the process (and those I have are really not great), but they came together pretty quickly! A half-batch of the pie crust dough (this time with the sugar added back into the recipe!) made seven hand pies.

So come morning, breakfast was all ready!


Both little miss and little man enjoyed these. Little miss actually didn't even realize that they were made with sourdough until halfway through her second. And continued to eat it anyway. (She's silly about sourdough these days...)


I can't wait to try an apple pie with this crust this fall when we go apple picking!!

So what kind of pie did you make? Link up and share!


Sourdough Pie Crust
(from The Bojon Gourmet)
(note - the original recipe was for a double-crust. Both times I made it, I halved it to meet the needs of what I was making. If you are making a double crust pie, simply double the recipe and divide the dough in half prior to refrigerating it.)

1 cup flour (you can use all purpose, whole wheat or a combination)
1/2 teaspoon salt
1 1/2 teaspoon sugar (variable, depending on your pie)
1/2 cup (1 stick) butter, cold, cut into cubes
about 1/2 cup 100%-hydration sourdough starter


In a large bowl, whisk together the flour(s), salt and sugar. Add the butter and rub it in with your fingertips until the mixture looks like gravel, with some butter worked in and some 1/4" chunks remaining. Gradually add the starter, folding the mixture with a spoon or your hands until it just starts to come together into large clumps.

Turn the dough out onto a lightly floured surface. Divide roughly into 8 portions. Fraisage the dough: using the heel of your hand, scrape a portion of dough across the surface. Repeat with the remaining dough. Gather the dough into a ball. Flatten the ball into a disc and wrap in plastic wrap. Chill for at least 30 minutes, and up to a few days. (Or freeze for up to a couple months. Defrost before proceeding.)

When you are ready to proceed with your pie, remove the dough from the fridge. If it is very firm, you may need to let it soften at room temp for 15 minutes or so. On a lightly floured surface, roll the dough out into a 14" round. Fit into the pie pan leaving a slight overhang.  Chill the rolled dough while you prepare the pie filling.


Bake the pie according to the directions for the type of pie you are making.

Enjoy!


Thursday, August 16, 2012

Cinnamon Swirl Bread

I have been wanting to make cinnamon bread for a while.  And, well, as you can tell by my choice of themes for this month's Bread Baking Day, I like a bread with a pretty swirl in it. So, while this isn't my official swirly bread for BBD, I did finally try my hand at cinnamon bread.

I had originally intended to make cinnamon raisin bread, and found this beautiful and delicious looking recipe to try. But when it came time to actually make it, little miss asked if it could be just cinnamon bread, without the raisins. And seeing as she eats plenty of fruits (dried and fresh) outside of baked goods, I had no problem agreeing.

The dough came together... interestingly.  The butter must have cooled a little, despite the temperature of the milk, and the yeast... well... it looked like it clung to the butter, so it was tough to see if it activated fully...


But I continued with the dough, and soon had a very soft and sticky ball of dough.


But, after a few hours of resting, it was clear that the yeast was working just fine!!


The dough was then rolled out, brushed with butter and sprinkled with a cinnamon sugar mixture.


I then rolled the whole thing up and carefully placed it into my greased loaf pan.  Now, either my loaf pan is too small (possible, though not probable...), or this recipe makes a tad too much dough for just one loaf. Because after its one hour rise, well, it was bursting from the pan.


I was a little nervous to bake it as it was, worried that it might overflow the pan even more, but I proceeded, just making sure to watch the top of the loaf (which I wound up covering loosely with foil part way through to make sure it didn't burn). Within ten minutes, the house smelled amazing. And after 40, it was ready to come out.


Okay, so the shape is a little funny. And it was a little too much dough for just one loaf.

But the bread was beautifully swirly.


And absolutely delicious.

Everyone loved it. Little man had two pieces. Sitting at the front door. In a laundry basket.


If that's not high praise, I don't know what is!


Cinnamon Swirl Bread
(from Alaska From Scratch)


For the Dough:
1 cup milk, warm
6 tablespoons butter, melted
2 1/2 teaspoons yeast
2 eggs
1/3 cup sugar
3 1/2 cups flour
1 teaspoon salt

For the Filling:
2 tablespoons butter, softened
1/4 cup white sugar
1/4 cup light brown sugar
2 tablespoons cinnamon

For brushing on loaf prior to baking (optional):
1/2 cup milk
1 egg

Combine the warm milk, melted butter, and yeast in the bowl of a stand-mixer. Stir gently and allow to stand for ten minutes.
Add eggs and sugar to to milk/butter/yeast mixture and mix to combine.
Gradually add the flour and salt. Knead with the dough hook attachment for 10 minutes.
Remove the bowl from the base, cover with plastic wrap (spray the plastic wrap with nonstick cooking spray first), and allow to rise in a warm spot for two hours.
Grease a loaf pan.
Flour your work surface. Turn dough out onto surface and roll into a rectangle, using your loaf pan as a guide for width. The rectangle should be about 18-24 inches long.
Brush 2 tablespoons of softened butter over the dough rectangle, then evenly sprinkle your cinnamon and sugar.
Beginning from far end, roll the rectangle into a loaf, rolling toward you, and place seam-side down in prepared loaf pan.
Place pan back in rising spot and allow to rise another hour.
Preheat oven to 350.
If desired, whisk together milk and egg. Spread lightly over top of risen loaf until evenly coated (this gives it that shiny, golden crust). (I skipped this on mine to maintain a soft crust all around.)
Bake for 40 minutes.
Allow to cool on wire rack.
Enjoy!

Tuesday, August 14, 2012

August Daring Cooks' Challenge - Cooking With Cornmeal

This month's Daring Cooks' Challenge was a little different. It was not a recipe, not a method of cooking, not some new technique... it was all about one ingredient.

Rachael of pizzarossa was our August 2012 Daring Cook hostess and she challenged us to broaden our knowledge of cornmeal! Rachael provided us with some amazing recipes and encouraged us to hunt down other cornmeal recipes that we’d never tried before – opening our eyes to literally 100s of cuisines and 1000s of new-to-us recipes!

Now, I love cornmeal. I have made cornbread several different ways, I have made polenta, and I am not afraid to use cornmeal where ever it might fit.  Rachael provided us with some pretty cool recipes (some of which I still really want to try!), but I wasn't exactly sure where to begin.

Well, where is better to begin than, well, breakfast!

Little miss happened to ask for pancakes the morning after this challenge was announced.  So I told her sure, and that we'd try something fun. I substituted half of the flour in my basic pancake recipe (the one in my head... I don't even know where I got it anymore!) with, you got it, cornmeal!


Batter mixed, they went right onto the griddle (pan). They cooked up beautifully...


And little miss even helped me flip some of them!


Going with the cornmeal theme, rather than cover our pancakes with maple syrup, we served ours with strawberry jam.


And they got a pretty good review from the peanut gallery.


But I wasn't ready to call it quits on the challenge yet.  I still wanted to try something savory. Something different.

I decided to use cornmeal as a breading for some chicken. As the cornmeal has a different feel and taste than a usual flour or breadcrumb coating, I wanted to try to come up with a meal that would be different. My first go-to, easy thought for breaded chicken was chicken parmesean. But the cornmeal didn't feel like chicken parm to me. It felt more... Mexican.  But chicken parm is yummy. That's when I came up with the idea of Mexican cornmeal chicken... not parm...

Now, I will full well admit that I winged this. I came up with an idea in my head and just went for it in my normal "go with it" kind of way - didn't measure, just went by feel.

I started with a pile of cornmeal and chose some spices - garlic powder, cumin and cajun seasonings.


The spices were combined, then the chicken pieces (boneless, skinless breast, cut thin) were generously coated, then pan fried in olive oil.


The chicken was fried until just golden, then placed into a baking pan, on top of a bed of pinto beans.


Once all of the chicken was cooked and in the pan, I spooned some salsa over each piece, then popped the whole thing into the oven. About ten minutes before we were ready to eat, I took out the pan and topped each piece with sliced queso blanco.  The pan went back into the oven for about 8 minutes, and then I switched the oven to the broil setting for the final minutes to really melt that cheese.

The results...


...were delicious. We will definitely be repeating this meal. Which I never would have come up with if it were not for this challenge.

Rachael, thank you for encouraging me to think outside the box and try some new things with cornmeal! It's great to look at an "old" ingredient with a new eye, and that's just what you did for me.

To see the other creative cornmeal dishes cooked up in the kitchen this month, check them out here.


Cornmeal Pancakes

1/2 cup all purpose flour
1/2 cup cornmeal
2 teaspoons baking powder
2 tablespoons sugar
1/2 teaspoon salt
1 cup milk (I used coconut milk)
1 egg
2 tablespoons vegetable oil (or canola, or melted butter)

In a medium sized bowl, whisk together the flour, cornmeal, baking powder, sugar and salt. In a two-cup measuring cup, measure out your milk, then add in the egg and oil, and combine well.
Pour the wet ingredients into the dry and mix until fully combined.
Cook pancakes on a hot skillet, about one to two minutes per side.
Serve with your favorite jam and enjoy!


Mexican Inspired Chicken not-Parm

3 boneless skinless chicken breasts, each cut into about three thin yet evenly sized pieces
1 1/2 cups cornmeal
garlic powder, cumin and cajun seasonings, to taste
1 can pinto beans
1/2 - 3/4 cup salsa (I use mild, use what you'd like)
4 oz (about) queso blanco, sliced thin (or shredded)

Cover a 9" x 13" baking dish with foil and spray with non stick cooking spray. Preheat the oven to 350 degrees.
Empty the can of pinto beans over the bottom of the covered pan, spreading them out evenly.
On a shallow plate or dish, combine the cornmeal and spices.
Heat a skillet over medium high heat, and add a few tablespoons of extra virgin olive oil.
Generously coat each piece of chicken in the seasoned cornmeal, then place each piece into the pan, being careful not to crowd the pan (work in batches).
Cook the chicken until each side is golden brown, turning so that both sides are equally golden.
As each piece is done, place it in the pan, over the beans.
Once all of the chicken is in the pan, spoon a generous tablespoon of salsa (or as much as you would like) over each piece.
Cover the pan with foil and bake for about 30 minutes.
Remove the foil and top each slice with the sliced (or shredded) queso blanco.
Bake for another 10 minutes (times are approximate, depending on the size and thickness of your chicken. Mine were still a little thick, even after cutting...), changing the oven setting to broil for the final two minutes (watch it carefully once you switch it to broil!).
I served this over multi-colored vegetable rotini pasta, but you could go with rice or whatever you prefer.

Enjoy!

Related Posts with Thumbnails